TradingView trading tutorial
With OctoBot cloud, it is very easy to automate your trades using your own TradingView-based strategies.
Here is a step by step tutorial on how to get started and make your first trades with OctoBot using paper trading and TradingView.
In this tutorial, you will learn how to:
- Create a TradingView OctoBot and make it buy BTC whenever a TradingView alert is received
- Configure TradingView to notify your OctoBot when the BTC price crosses 40.000 USDT
- Follow your TradingView OctoBot activity
1. Create your TradingView OctoBot
1.1 Start a new TradingView OctoBot
-
If you are creating your OctoBot account, scroll down to
Automate your own strategy with TradingViewin the introduction, after choosing your exchange.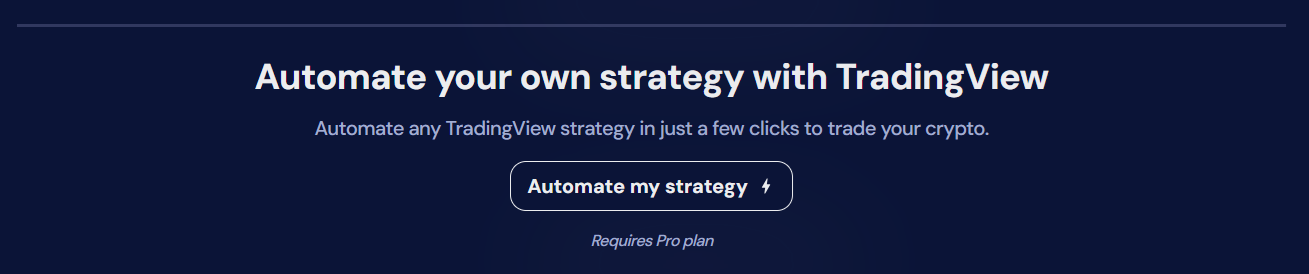
-
Or go to the
Customtab of the strategy explorer.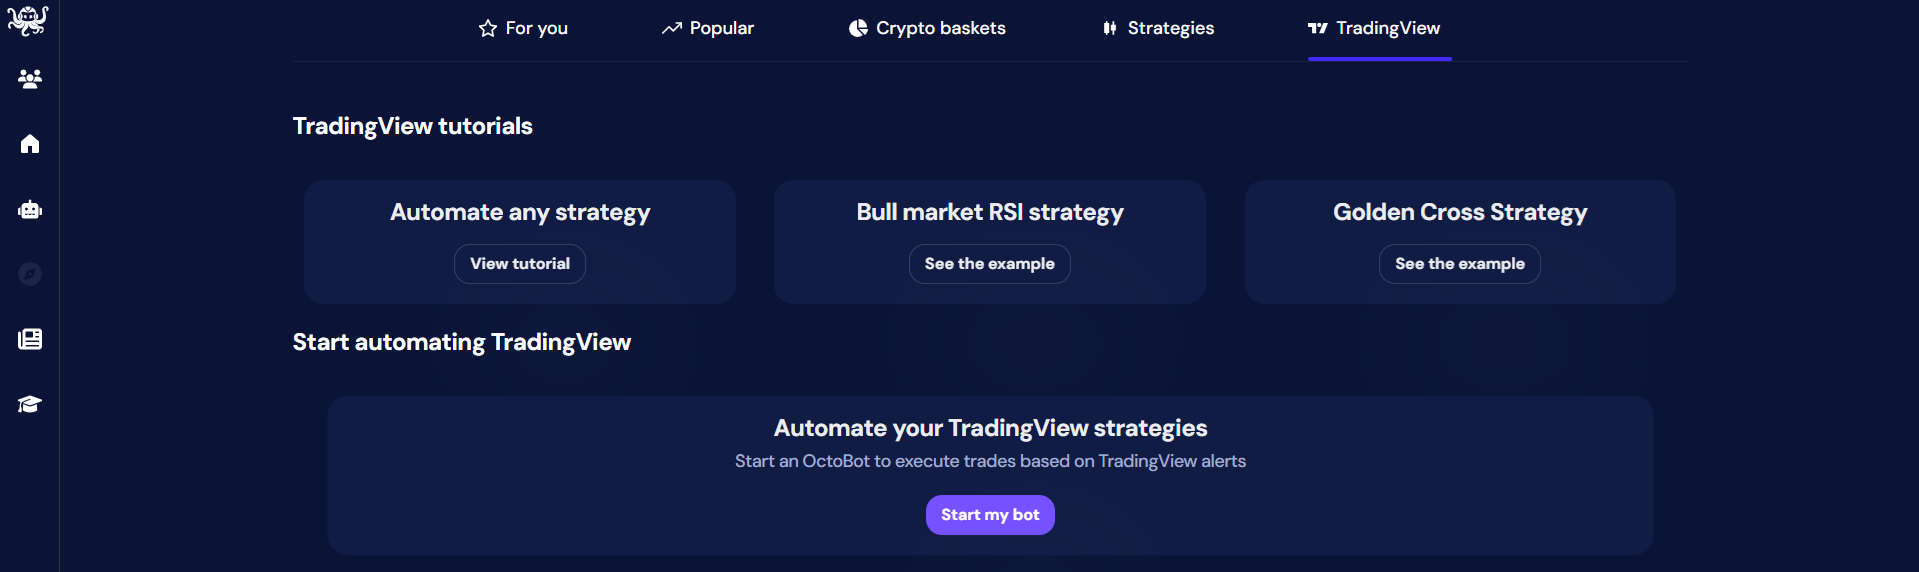
1.2 Choose the exchange you want to trade on
Just like regular bots, TradingView OctoBots are running on a single exchange at a time.
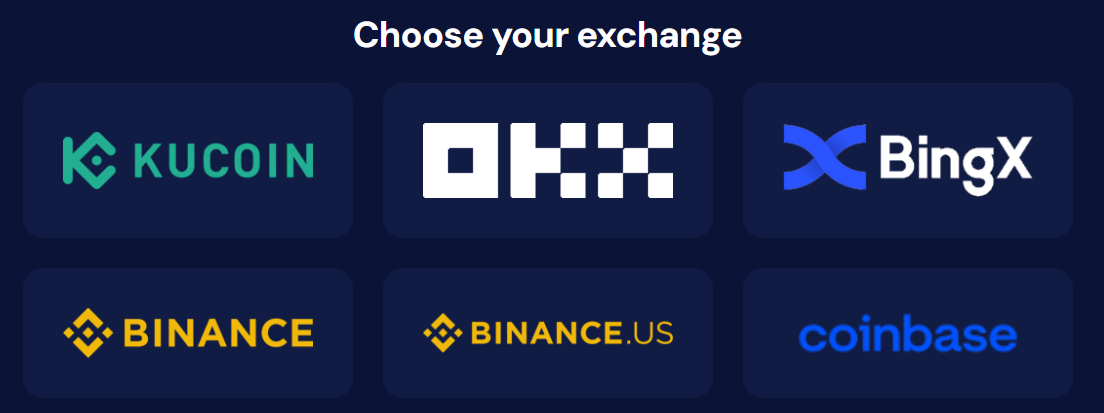
Select the exchange you want this OctoBot to trade on.
1.3 Select paper or real trading
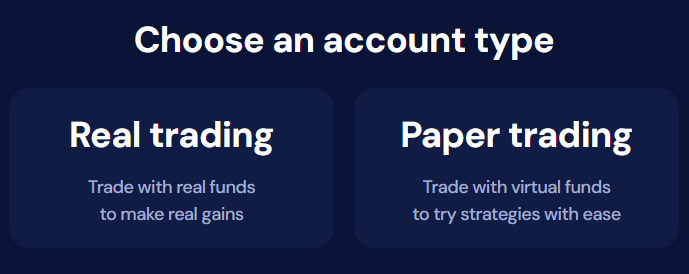
Also like other bots, you can use your TradingView OctoBot on a real exchange account or risk free with paper trading and simulated funds.
We suggest to start with paper trading until you are confortable automating your TradingView strategies with your real funds.
1.4 Start your OctoBot
Once your account is selected and initialized, you can start your TradingView OctoBot.
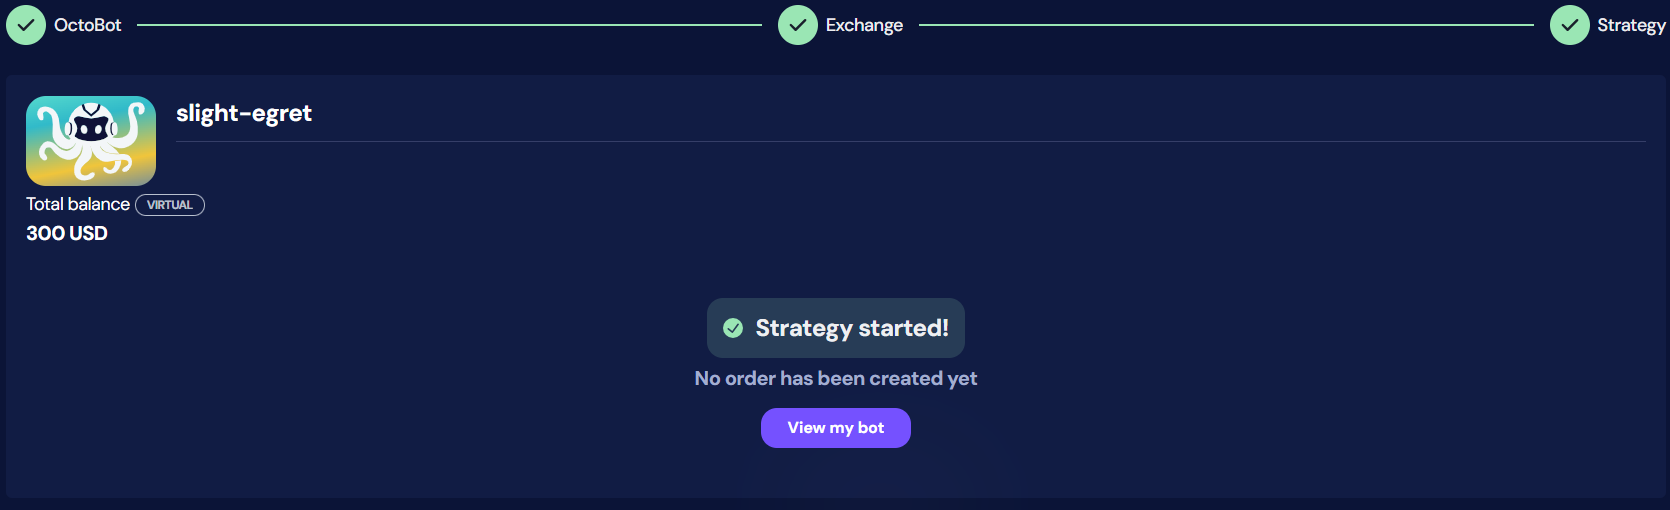
When starting, TradingView bots won't create orders, they will be waiting for TradingView alerts to trade.
1.5 Meet your TradingView bot
Your TradingView OctoBot is now ready to trade on the account you selected everytime it will be notified from your TradingView alerts.
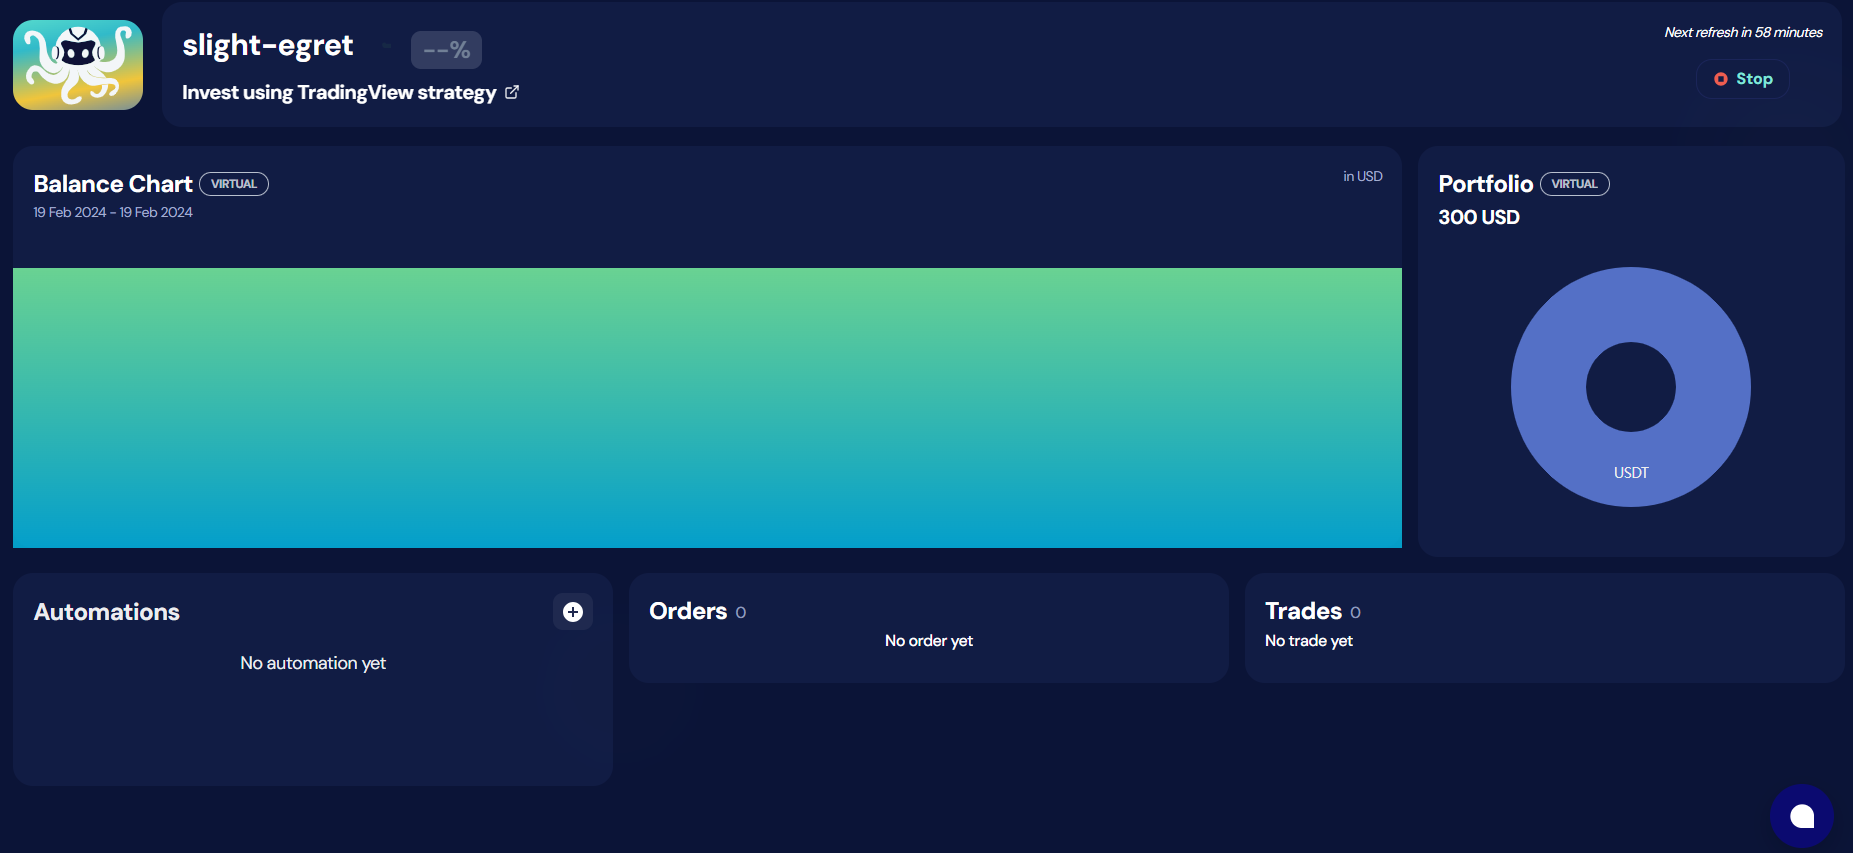
New TradingView bots are using automations to trade. Therefore at least one automation is required for your bot to start trading. We will now create your bot's first automation.
1.6 Introducing automations
Automations are the building blocks of every TradingView strategy on OctoBot.
Automations are actions that are automatically performed when receiving the associated TradingView alert. An automation can be creating or cancelling orders according to your configuration.
Each bot can have as many automation as necessary, there are no limit in the amount of automations and traded pairs a TradingView OctoBot can handle.
Learn more about automations on the tradingView automated trading guide
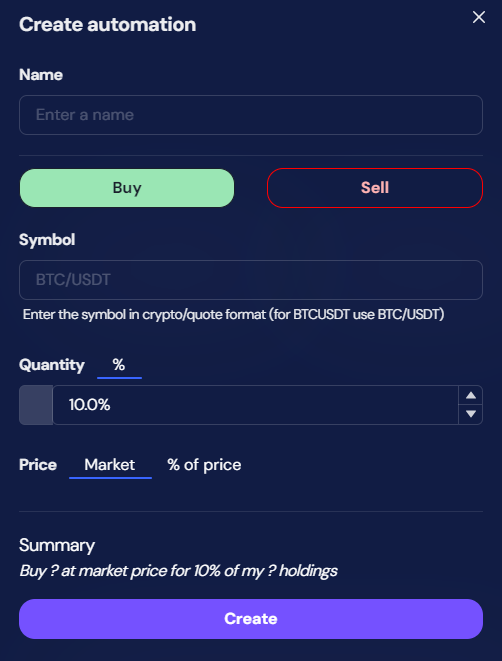
At OctoBot cloud, we try to keep things simple. Here is an example of how to create an automation and as you can see, it's pretty straight forward.
Let's create an automation to buy BTC on your account when receiving a TradingView alert.
1.7 Create an automation
Lets create a new automation the + button
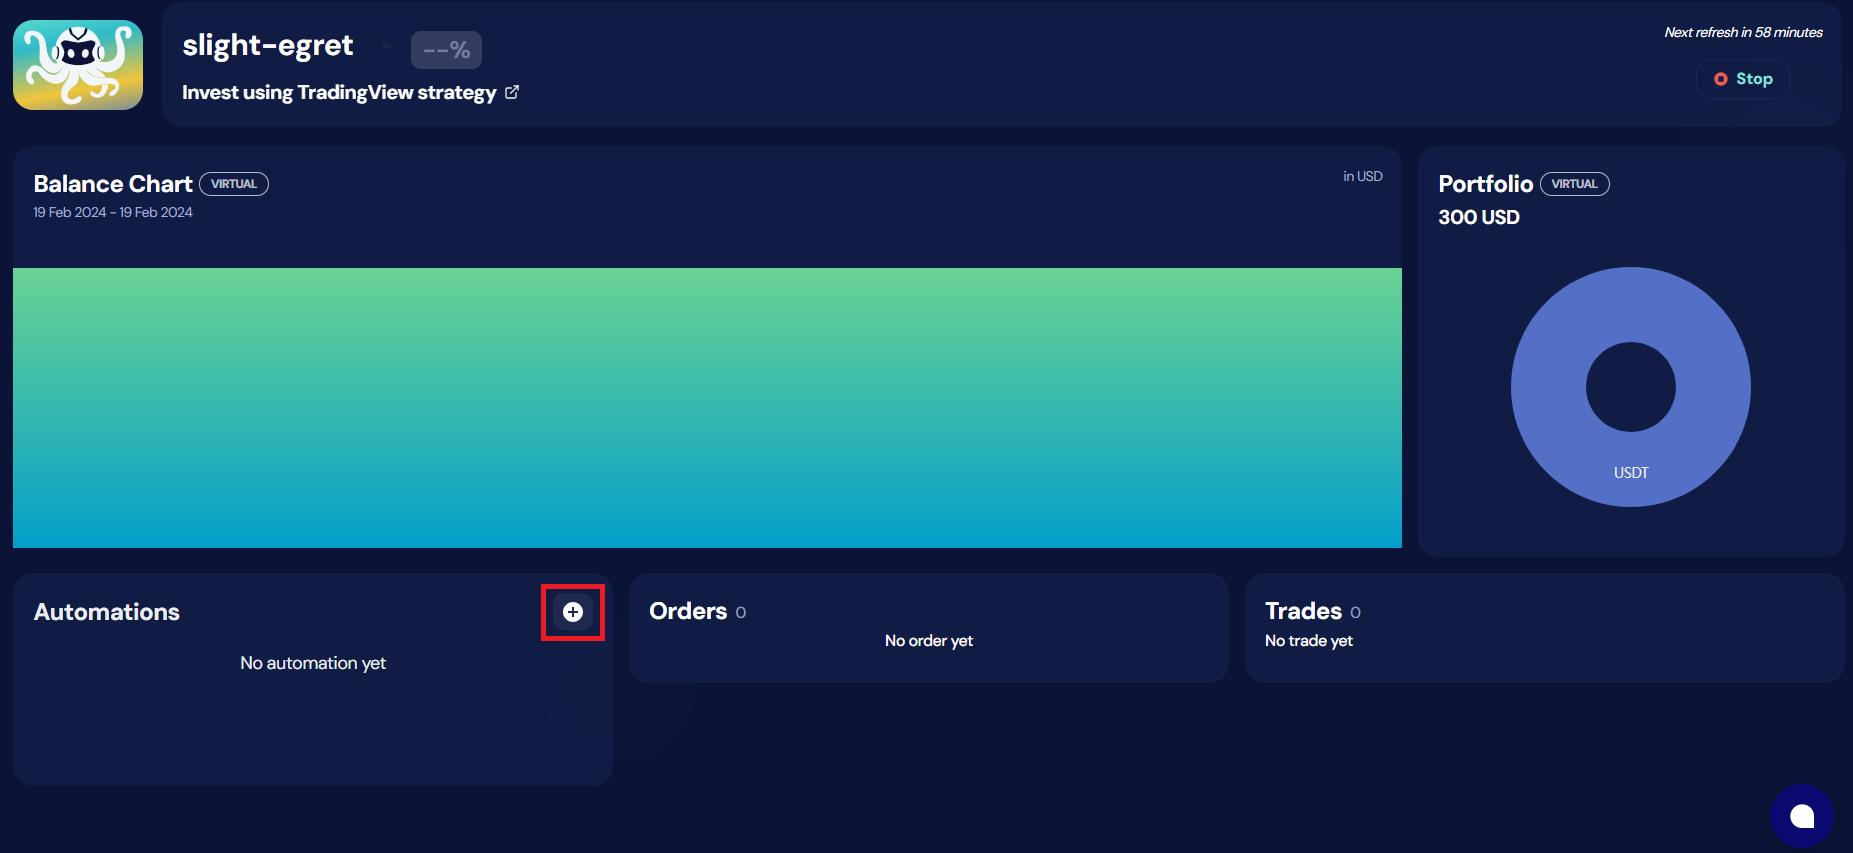
And enter the following information on the Create automation panel:
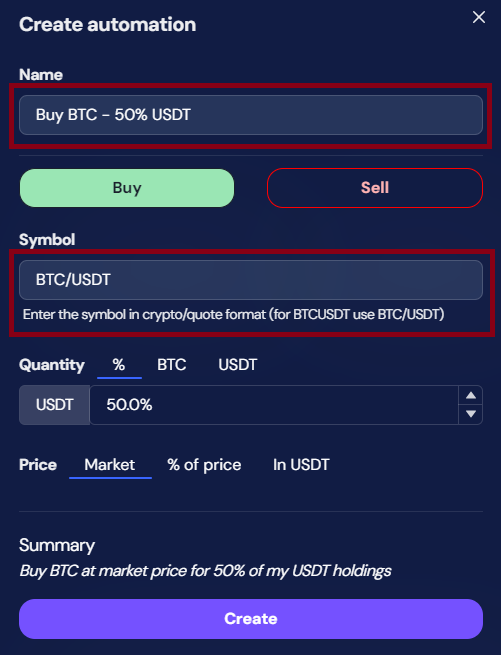
- Name: the name of your automation, you can use the name you want to easily find your automation later on
- Order symbol: the traded symbol to create the order on. Please note that it has to follow the
/format. For example BTCUSDT on TradingView would be BTC/USDT on your automation
Press Create once you are satisfied with your configuration.
If you need to use more advanced automations such as using dynamic values from Pine Script, cancelling orders, creating automated take profits or stop losses, check out custom automations.
2. Configure TradingView to send alerts to your bot
2.1 Open the connection panel of your automation
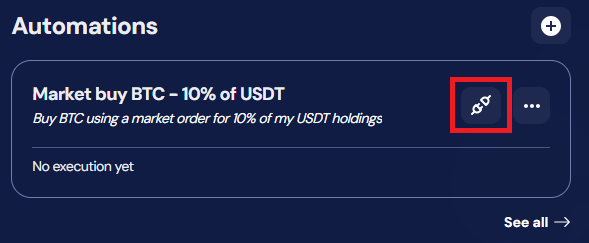
In the Automation section of your TradingView OctoBot, open the connection panel of the Market buy BTC - 10% of USDT automation.
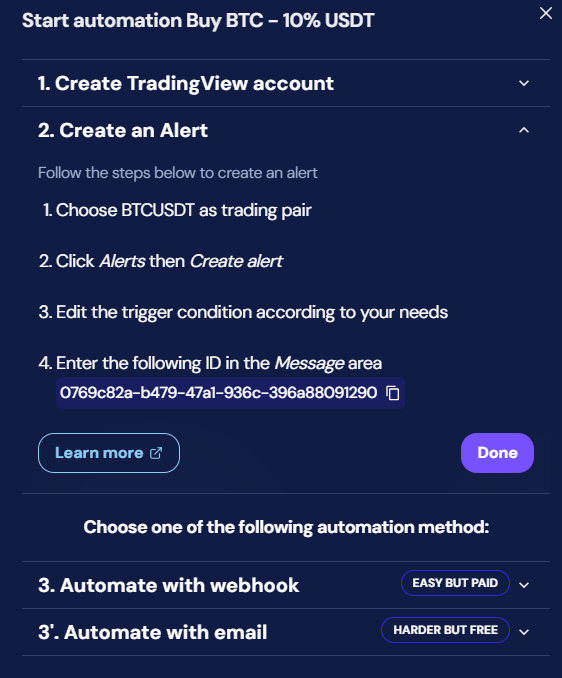
This panel show you all the necessary information to trigger the Market buy BTC - 10% of USDT automation from TradingView.
2.2 Log in to TradingView
Using another tab (to keep the connection panel open), go to TradingView and login or create an account.
Binding TradingView to OctoBot uses alerts which can be sent to OctoBot using Webhooks. They Requires a "Essential" or higher plan. You can create a TradingView account and start a 30 days free trial using this link.
2.3 Select your trading pair
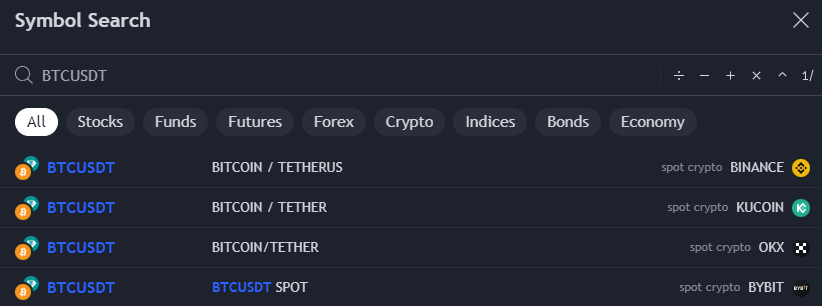
In our current automation, we are trading BTC/USDT. Let's select a BTCUSDT market on TradingView, for example the Binance one.
2.4 Go to the Alerts tab
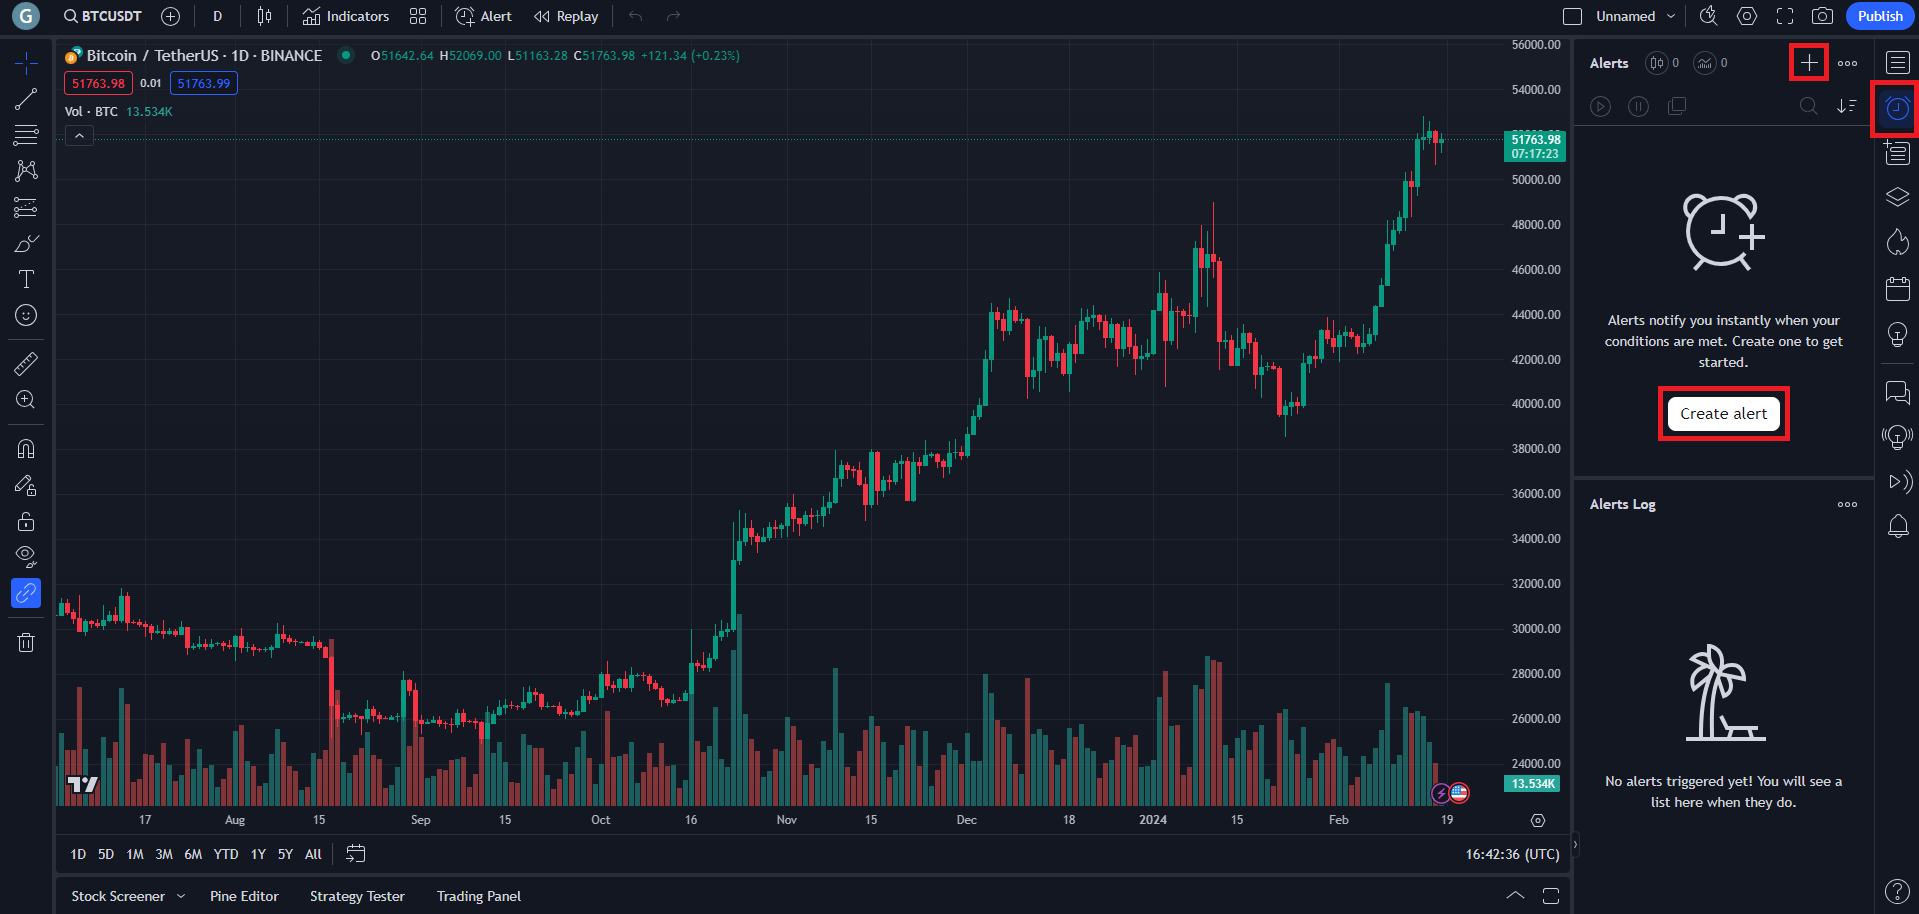
From the alerts tab, click Create alert.
2.5 Configure the webhook URL
In the "Notfications" tab of the "Create Alert on BTCUSDT" menu on TradingView, enter the webhook URL of your OctoBot account.
-
Select
Webhook URL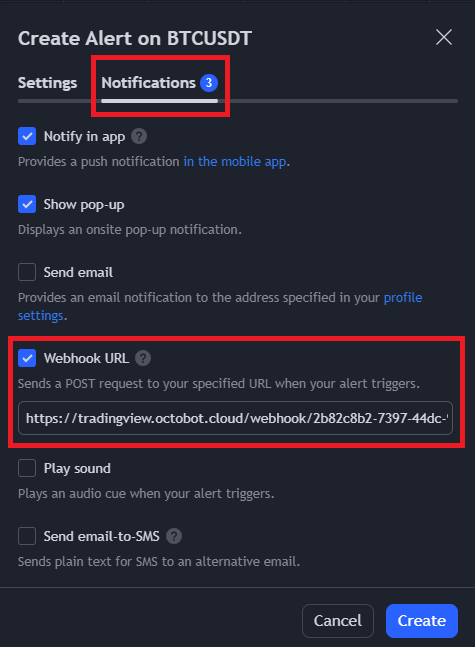
-
Paste your webhook URL. You will find your webhook URL in the
3. Automate with webhooksection of the connection panel of your automation, on your OctoBot tab.
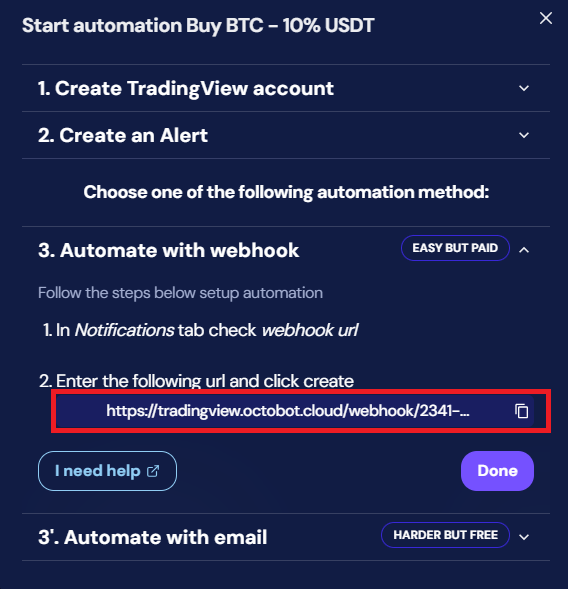
You might need to enable two factor authentication on TradingView to enter a webhook URL.
Your webhook notifications are now ready!
The Webhook URL configuration only needs to be done once. Other alerts you will create will automatically use this notifications configuration.
2.6 Create a new alert
Going back to the "Settings" tab of the "Create Alert on BTCUSDT" menu on TradingView, fill in your alert details.
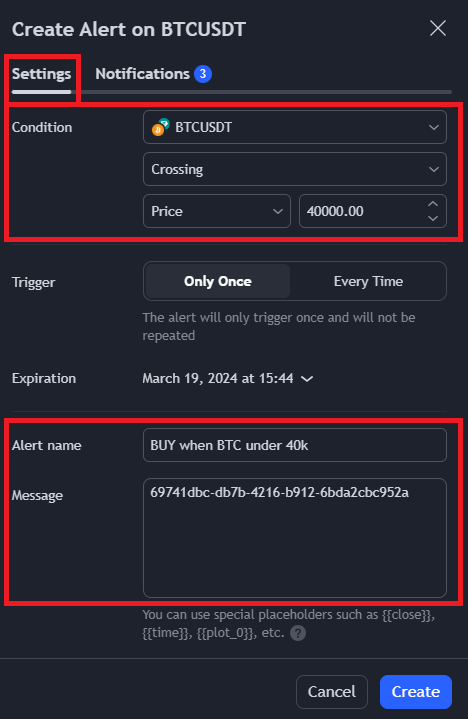
In this tutorial, we will create a simple alert based on the BTC/USDT price that will trigger our Market buy BTC - 10% of USDT automation when the BTC price crosses 40.000 USDT on TradingView.
- Select a condition to trigger your alert on.
- Name your alert. This name has no impact and is only for you to remember the alert
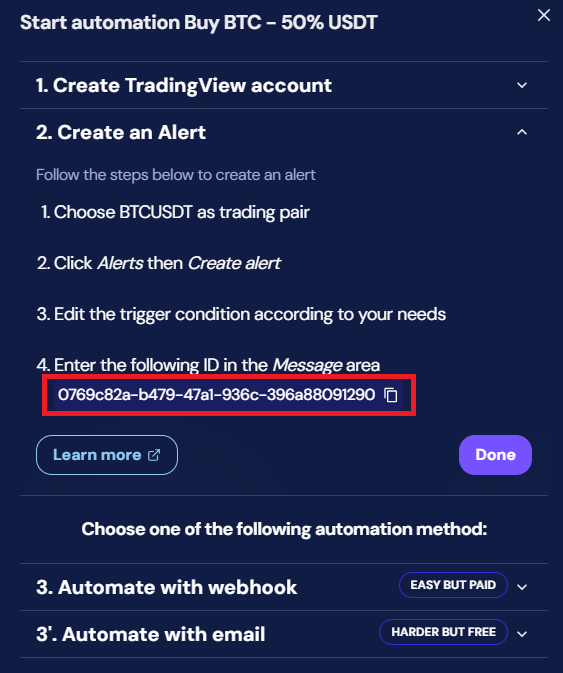
- Fill the "Message" field with the identifier of your automation that you will find on the
2. Create an Alertsection of the connection panel of your automation, on your OctoBot tab.
- Press "Create" to save your TradingView alert.
3. You are all set
Congratulation! You now have a TradingView alert that will automatically trigger your Market buy BTC - 10% of USDT automation on your OctoBot account as soon as the alert will fire on TradingView.
3.1 Following alerts
Every time a new alert is received, your OctoBot will save it and you will be able to see its execution result.
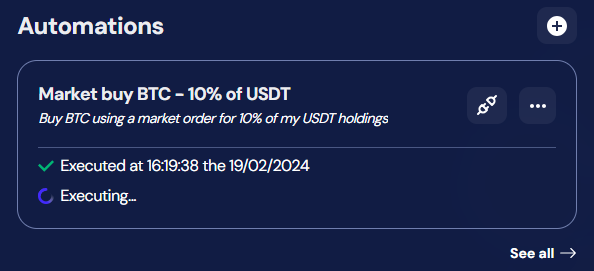
You can also view your bot's full alert and automation history using the See all button

3.2 Creating other automations
For each of your TradingView OctoBot, you can create as many automations as you want and trade on as many symbols as you wish.
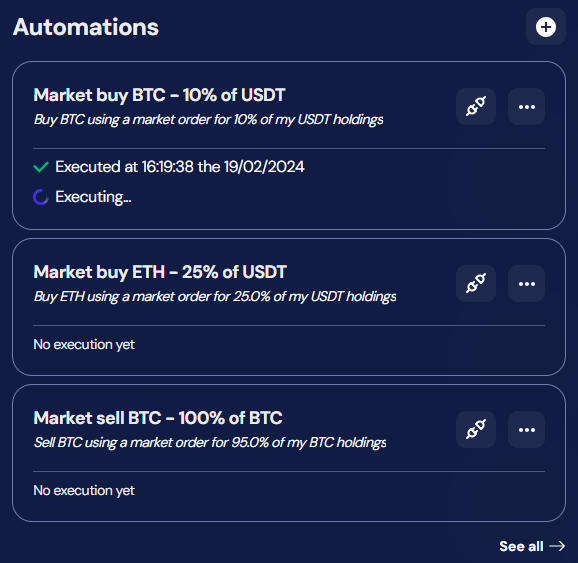
In this tutorial, we created a BTC/USDT automation triggered by a price event but there are many other ways to trigger TradingView alerts including:
- Price actions, like the one we created in the tutorial
- Indicators, to trade using simple or sophisticated technical indicators
- Pine Script strategies, to trade from full TradingView strategies written in Pine Script
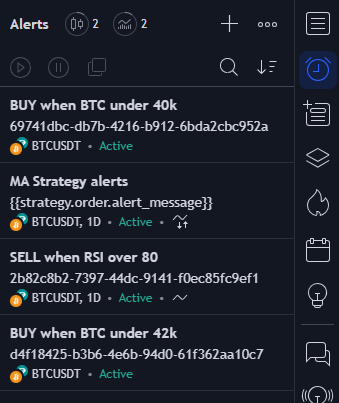
Lean more on the different types of alerts on the TradingView alerts automation guide.