How to automate any TradingView strategy on OctoBot cloud
Automate any TradingView strategy within seconds using a TradingView account and the AI-powered strategies generator.
Note: The automation of TradingView alerts by email is unfortunately no longer available due to a recent restriction by TradingView.
Any TradingView strategy can be automated using OctoBot
OctoBot can easily be connected to TradingView to automate trades based on price events, indicators and also full strategies.
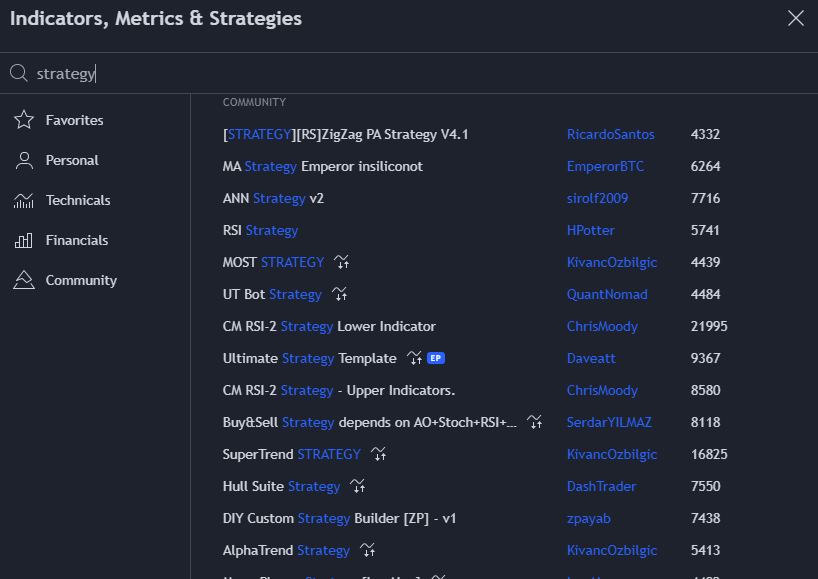
Automating a TradingView strategy has many advantages over simple price events or indicators automation.
When automating a strategy, you can:
- Automate your trading using any TradingView strategy, your own strategy created by OctoBot's TradingView strategy generator, or a strategy provided by your favorite strategy creator
- Combine multiple indicators to create your entry and exit orders when all your conditions are met
- Use TradingView built in backtesting engine to optimize your strategy
1. Preparing your strategy to connect to your OctoBot
To make your OctoBot trade on your exchange account (or a risk-free virtual account) based on a TradingView strategy, all you need to do is to bind the strategy orders to your TradingView automations using regular TradingView alerts.
Once you know which strategy you want to use, display it on your TradingView chart and click the {} icon.
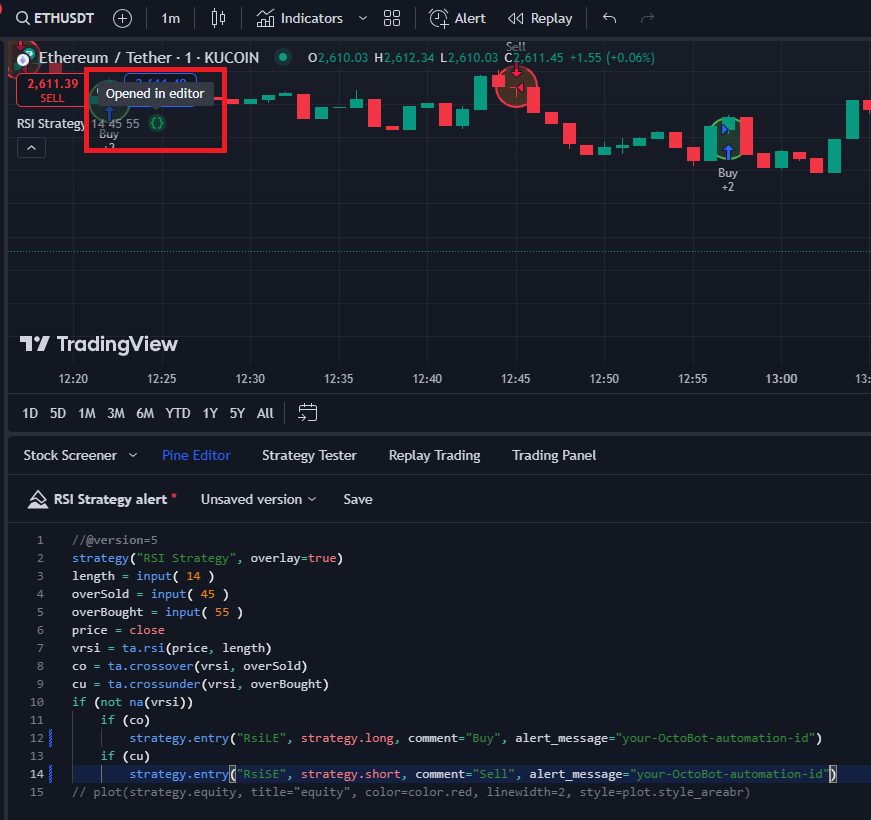
This displays the strategy Pine Script code. Changing this code will change the strategy behavior.
You can't find the code for the strategy you want to use? Generate it using OctoBot's TradingView strategy generator .
Each TradingView Strategy using Pine Script in version 4 and above can use the strategy.entry, strategy.exit, strategy.close and strategy.order keywords to trade in order to enter and exit positions.
In order to bind those trades to your exchange account using OctoBot, all you need to do is to add the alert_message="your-OctoBot-automation-id" parameter to the keywords.
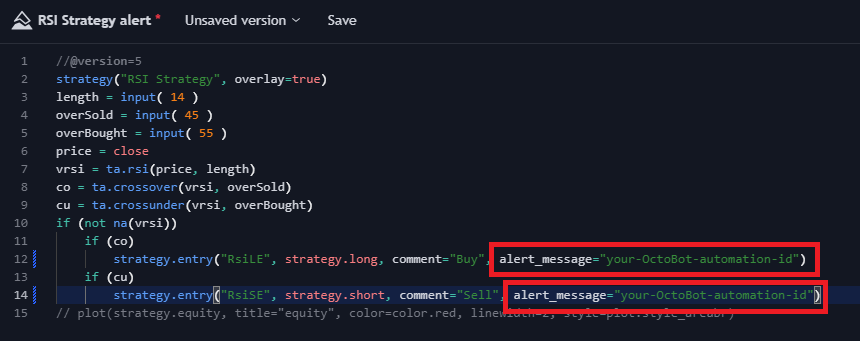
Note that the initial strategy.entry("RsiLE", strategy.long, comment="Buy") have been changed to strategy.entry("RsiLE", strategy.long, comment="Buy", alert_message="your-OctoBot-automation-id") in order to include the alert_message="your-OctoBot-automation-id" parameter.
In your Pine Script strategy, each and every call of the following keyword should include this alert_message="your-OctoBot-automation-id" parameter:
strategy.entrystrategy.exitstrategy.closestrategy.order
Forgetting to add the alert_message parameter to any of those call will result in missing signals on your exchange.
Now that each strategy call contains the parameter, go to the OctoBot strategy explorer custom tab and start a new TradingView OctoBot.
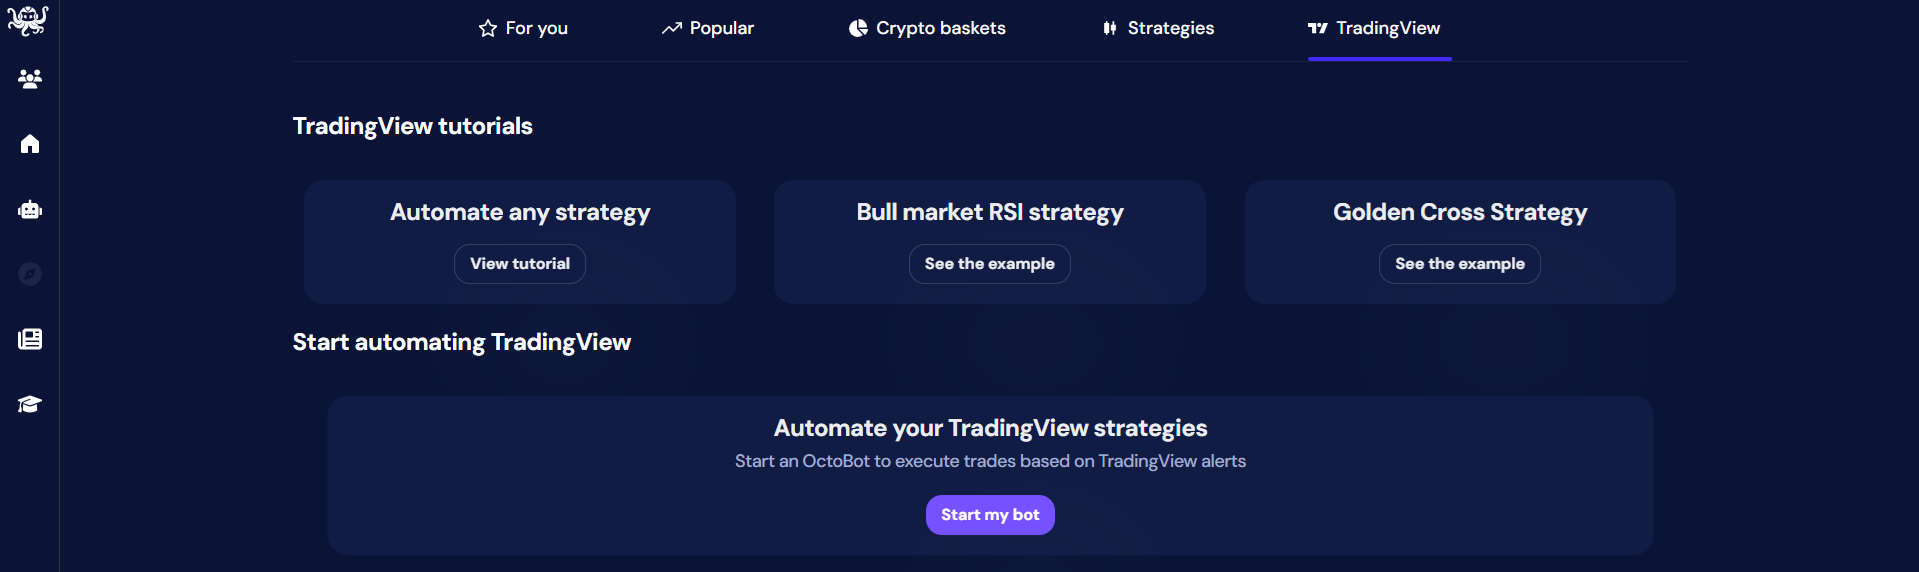
Here is a guide on how to start a TradingView OctoBot if you are unsure about how to do it.
Now that your TradingView OctoBot is up and running, all you need to do is to create an automation for each trading signal of your strategy.
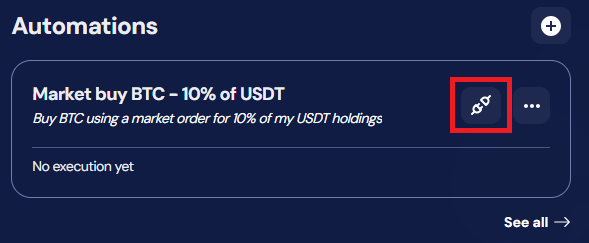
Automations are actions to be automatically executed by your OctoBot when triggered from TradingView alerts.
2. Option A: Using base automations
2.1 Creating base automations
Each strategy.entry, strategy.exit, strategy.close and strategy.order keyword creates a trade signal, just create an automation for each of those signals.
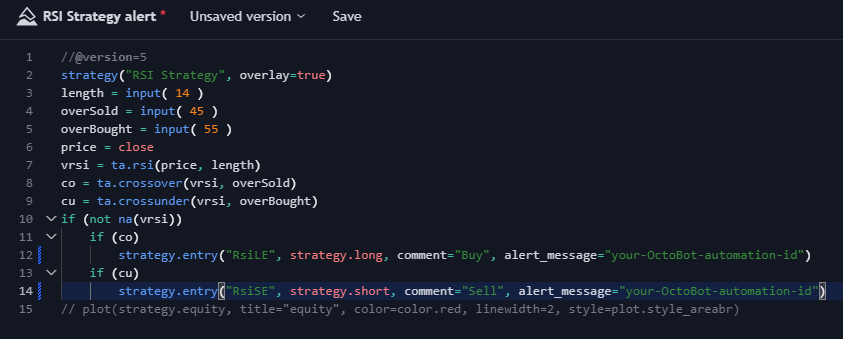
In this simple RSI strategy, two signals are emitted: a LONG and a SHORT signal, both of which being created by a strategy.entry keyword.
In this example, we want to buy when the LONG signal is emitted and sell when the SHORT signal is sent.
We will therefore create the two following automations:
Automation 1 : long signal
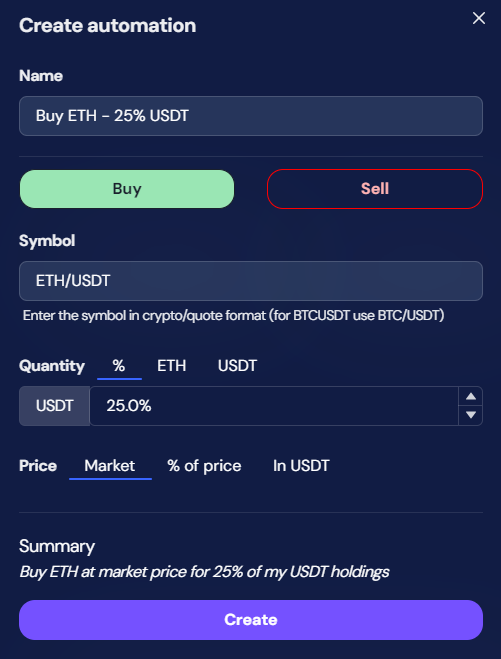
Buying ETH/USDT using 25% of the portfolio at market price.
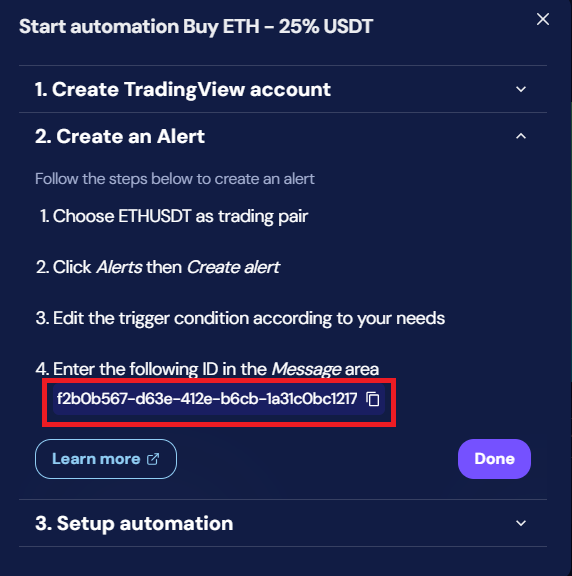
We will use the ID of this automation to replace the
your-OctoBot-automation-id text in the first strategy.entry keyword.
Automation 2 : short signal
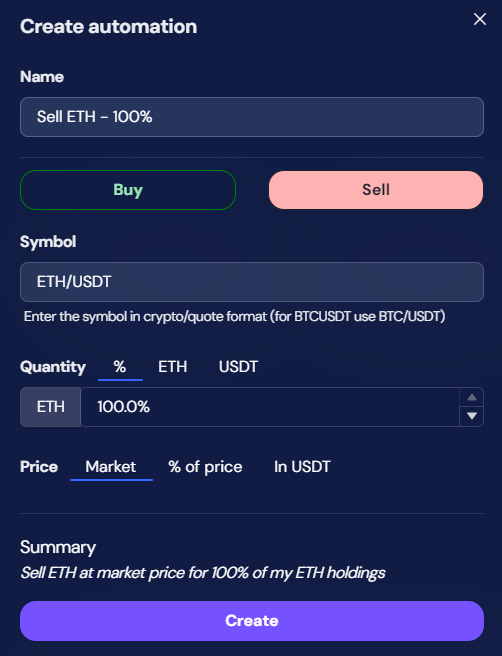
Selling 100% of the holding of ETH/USDT at market price. We will use the ID of
this automation to replace the your-OctoBot-automation-id text in the second
strategy.entry keyword.
2.2 Binding your TradingView strategy to your automations ids
1. Copy your automation ids into your strategy alert_message
Copy the id of each of automation into the alert_message text value of their associated signal.
There should not be any your-OctoBot-automation-id remaining in your strategy Pine Scripe code.
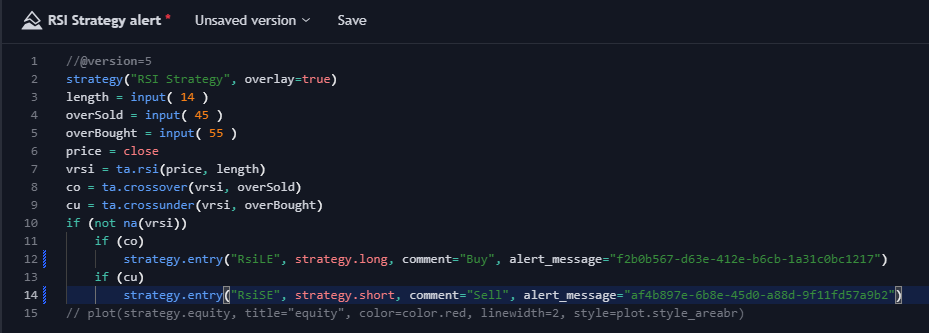
Note the f2b0b567-d63e-412e-b6cb-1a31c0bc1217 and af4b897e-6b8e-45d0-a88d-9f11fd57a9b2 texts that are now located in the strategy.entry keyword instead of the default your-OctoBot-automation-id. Naturally, those two identifiers are example values and your own automation identifiers should be used instead.
2. Configure the TradingView alert
Create a new TradingView alert bound to your strategy and change the Message section of the alert to only contain the value of the alert_message parameter (which is your automation id).
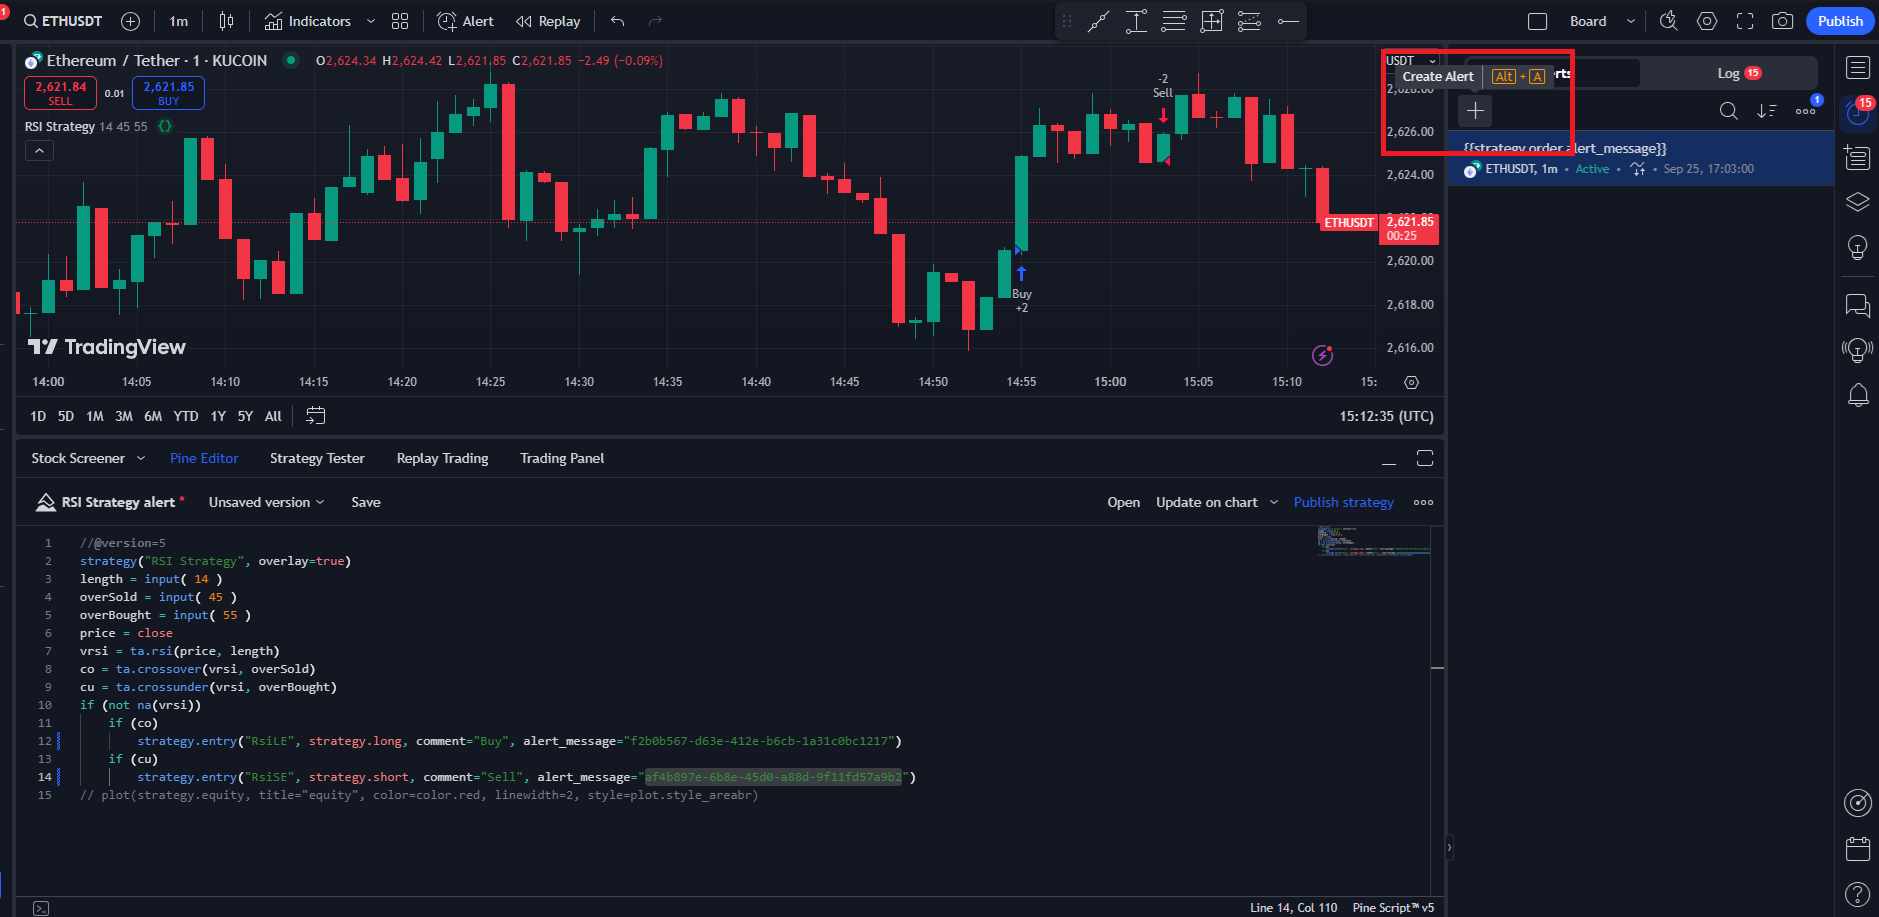
Open the Alerts view on the right and click Create Alert.
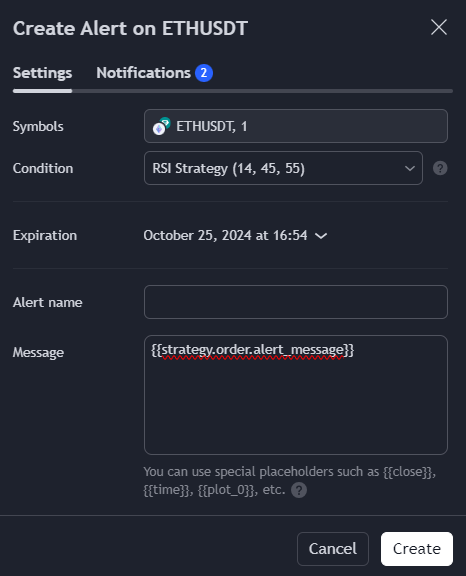
- Select your strategy in the
Conditionsection. Please note that changing your strategy configuration will require you to select the newest version of the strategy in this alert. - Use this exact syntax for the
Messagecontent :{{strategy.order.alert_message}}
3. Make sure your notification settings are up-to-date
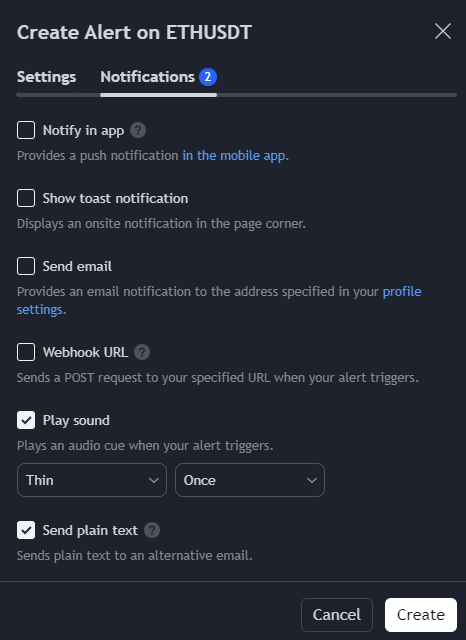
You will to use webhook notifications to trade using this strategy. Before confirming the alert, always make sure your alert's Notification configuration is updated, or your OctoBot might not receive your alerts.
2. Option B: Using custom automations
2.1 Creating custom automations
TradingView tutorial: automate any strategy with OctoBot custom automation.
Each strategy.entry, strategy.exit, strategy.close and strategy.order keyword creates a trade signal, just configure the associated alert_message parameter to contain your custom automation parameters.
In this simple RSI strategy, two signals are emitted: a LONG and a SHORT signal, both of which being created by a strategy.entry keyword.
In this example, we want to buy when the LONG signal is emitted and sell when the SHORT signal is sent.
We will therefore update the alert_message of each LONG and SHORT signal to send our buy and sell signals:
Custom automation: Buy 0.1 ETH on long signal and sell it on short signal
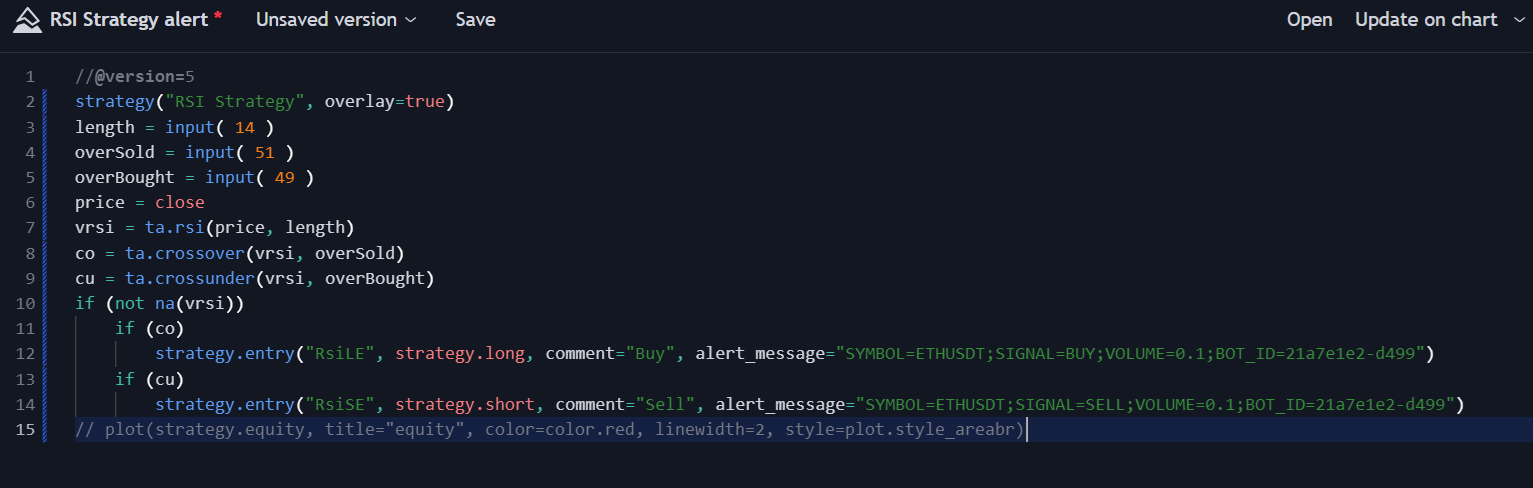
- Content of the LONG signal
alert_message:SYMBOL=ETHUSDT;SIGNAL=BUY;VOLUME=0.1;BOT_ID=21a7e1e2-d499- Content of the SHORT signalalert_message:SYMBOL=ETHUSDT;SIGNAL=SELL;VOLUME=0.1;BOT_ID=21a7e1e2-d499
You will find the list of supported parameters on the automations guide
Note: here BOT_ID=21a7e1e2-d499 is just an example value and should be replaced by your TradingView OctoBot id, which you can find in as the last component of your TradingView OctoBot url.
And this is all, this simple alert_message automatically tell OctoBot what to do when the strategy triggers.
2.2 Binding your TradingView strategy to your custom automations
Create a new TradingView alert bound to your strategy and change the Message section of the alert to only contain the value of the alert_message parameter (which is your automation content).
Open the Alerts view on the right and click Create Alert.
- Select your strategy in the
Conditionsection. Please note that changing your strategy configuration will require you to select the newest version of the strategy in this alert. - Use this exact syntax for the
Messagecontent :{{strategy.order.alert_message}}
3. Make sure your notification settings are up-to-date
You will to use webhook notifications to trade using this strategy. Before confirming the alert, always make sure your alert's Notification configuration is updated, or your OctoBot might not receive your alerts.
You are all set!
That's all! With this setup, when your TradingView strategy will see a buy or sell opportunity, it will:
- Call
strategy.entry(or any of thestrategy.keyword you used) - Which will send an alert bound to your TradingView OctoBot Automation id or custom Automation content (identified by the
alert_messageparameter) - Your OctoBot automation will be executed on your real of virtual exchange account